People Wondered about the Purpose of These 6 Things & Got Unexpected Answers
The world is a captivating realm, teeming with enigmatic objects that never cease to astound individuals with their appearance and, of course, their elusive purposes.
After all, not everything can be unraveled through a simple Google search, especially when you’re not entirely sure what you’re seeking.
In our everyday lives, mysteries constantly pique our curiosity, compelling us to unravel their secrets. The internet, our boundless portal to knowledge, connects us with online communities of investigators passionate about exploring these enigmas. Through the digital realm, the pursuit of understanding has transcended physical boundaries, offering us a wealth of information and expertise at our fingertips.
Every click delves deeper into the fascinating tapestry of the world, revealing hidden stories and captivating facts. Yet, amidst these discoveries, a universal truth emerges: often, things are not as extraordinary as they first seemed to be. Here are six mystery finds that people wondered about and received unexpected answers.
6. Junk or Something More?
An original poster shared this picture online after finding what they decided to call a “scoopy doodad” in a junk drawer. Holding the mysterious item in both their hands, they turned to the virtual world for help and, of course, answers.
They said it was extremely heavy, came with no markings, and bore a very narrow hole on its top. What could it be?
The Answer: According to netizens, the classic Sunbeam Mixmaster came with a juicer attachment, a bowl that could attach to the top of the mixer. The strange object happened to be the spout the juice would pour out of, with the wire part holding a small strainer to filter out the pulp.
5. An Old Cabinet Find
One user stumbled upon something in an old cabinet, which they said was made entirely of glass and had narrow holes throughout its length. Hoping to find out what it was, they shared the peculiar object’s photo online, and fortunately, many people were quick to solve the puzzle.
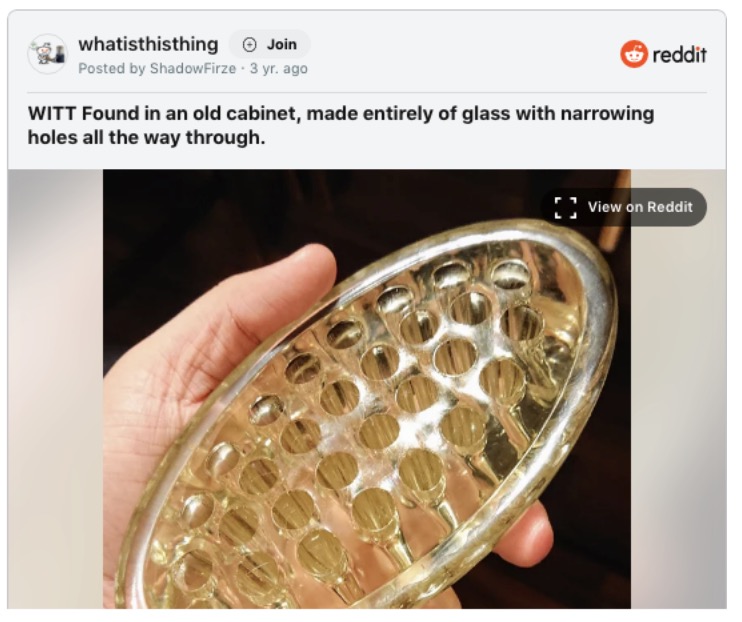
The Answer: The odd-looking glass object turned out to be a flower frog, used for holding a flower arrangement in a vase. The person who shared the answer said it had been made obsolete by foam and gels.
4. A Heavy Glass Object
This person turned to Reddit to share a picture of a glass object lying on a wooden table. They said it was extremely heavy, came with no markings, and bore a very narrow hole on its top. What could it be?
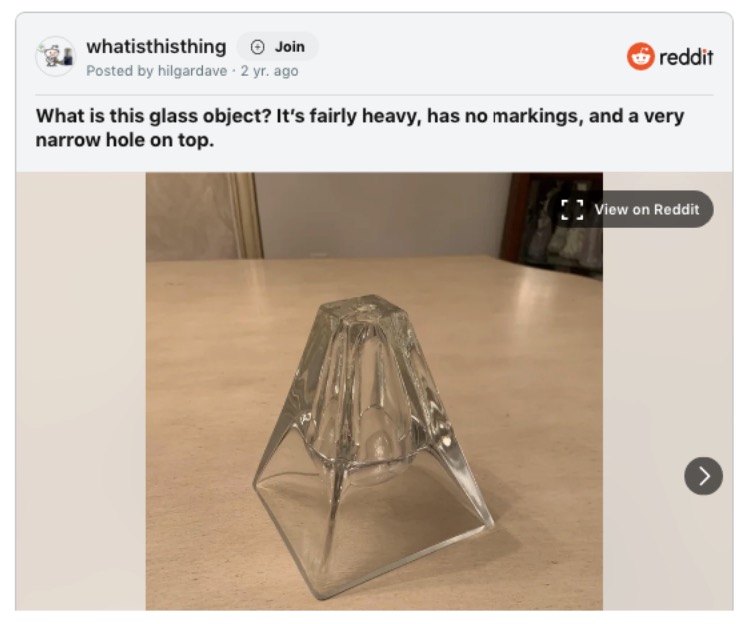
The Answer: The mystery of the bizarre-looking glass object was cracked by a genius netizen who used two words to solve the puzzle: Oil candle. We bet you didn’t see that one coming, or did you?
3. The Mystery Object Hiding inside a Bedroom Drawer
A Reddit user didn’t expect to find this unusual object while opening their bedside drawer. Upon closer inspection, they discovered that its bottom appeared to be made of suede or soft leather. But that was all they could manage to guess or conclude.
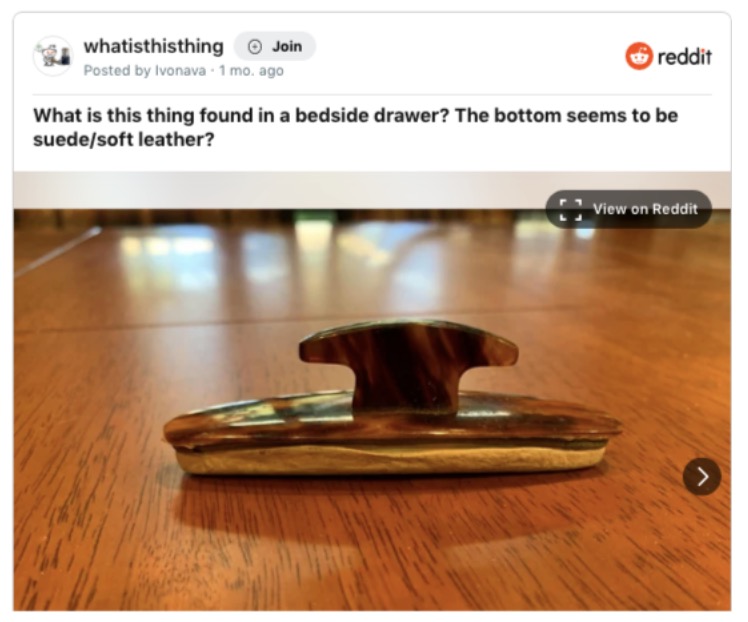
The Answer: Nobody could have guessed what it was until one user shared the answer and solved the mystery: It was a nail buffer. Even the original poster was shocked and said they clearly didn’t pay much attention to their nails.
2. What’s Hiding underneath the Floorboards?
Sharing the picture of a silver-colored object, somewhat resembling an antique scissor of sorts, one user couldn’t help but wonder what it could be. They said they found the bizarre thing under the floorboards in an 1800’s era home.
The Answer: The mystery of the puzzling item was cracked by one netizen, who shared it was used to remove the top of soft-boiled eggs. Another user quickly confirmed that the answer was correct.
1. A Baffling Hotel Room Find
A guest staying in a hotel room was baffled when they stumbled upon a vertical slot inside their bedside table. They couldn’t help but wonder what it was used for, and when they struggled to find the answer, they decided to ask the online community for help.
Julia Roberts Stuns Fans with Natural Look: No Makeup, Casual Clothes, and That Timeless Smile!
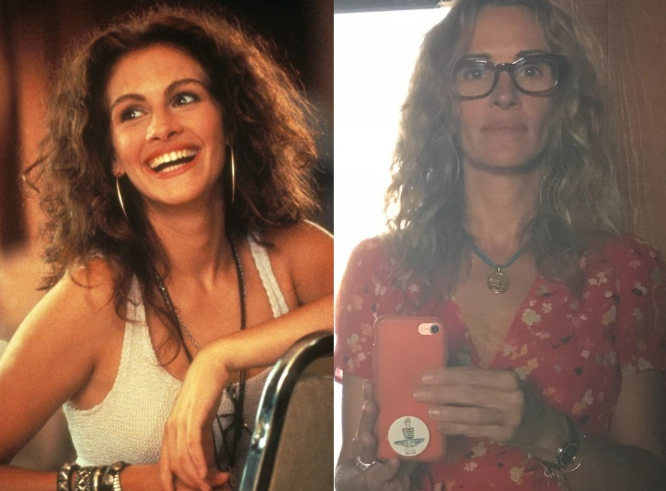
Julia Roberts, our beloved Pretty Woman, recently made headlines when she stepped out sans makeup and dressed casually, much to the surprise of her fans. The sight of the iconic Hollywood actress in her natural state left many in disbelief.
In a world where celebrities are often depicted as flawless beings, it’s refreshing to see them embrace their authenticity. Just like anyone else, they have the right to dress down and forgo makeup.

Captured by photographers in her everyday attire, Julia appeared refreshingly different from her glamorous on-screen persona. Yet, despite the absence of makeup, her timeless charm and infectious smile remained as captivating as ever.

These candid paparazzi shots resonated deeply with fans, who admired Julia’s willingness to show her real self.

While time may have passed, her genuine laughter continues to enchant audiences, proving that true beauty transcends superficial appearances.


Leave a Reply